How to do the-odin experiment
"Genetic Design Glowing GFP Kit"
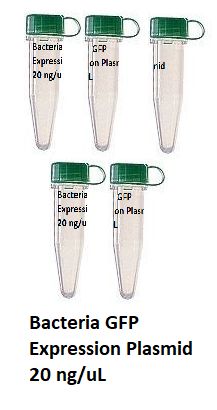
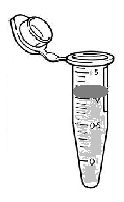
When the little white box arrives in the mail from the-odin, you need to immediately open it and look through the plastic baggies to find a baggie marked "Store in freezer at -20 deg C Upon Arrival". In that baggie are 5 green capped microcentrifuge tubes containing the plasmid which is the DNA for the Green Flourescent Protein (GFP) from a jellyfish. By the way, -20 deg C is -4 deg Fahrenheit.
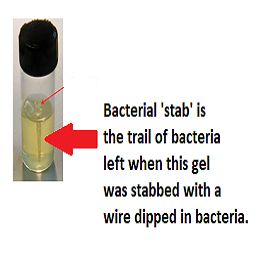
You will also find A baggie containing a small tube with a black cap marked "Store at 4 deg C in Fridge Upon Arrival Do Not Freeze!" This tube contains the 'stab' of the e-coli bacteria that we are going to make glow. And 4 deg C is 39.2 deg Fahrenheit.
Get both of these baggies into refrigeration asap. They need to be kept cool or they'll degrade before you get to use them.
---------------------------------------------------------------------------
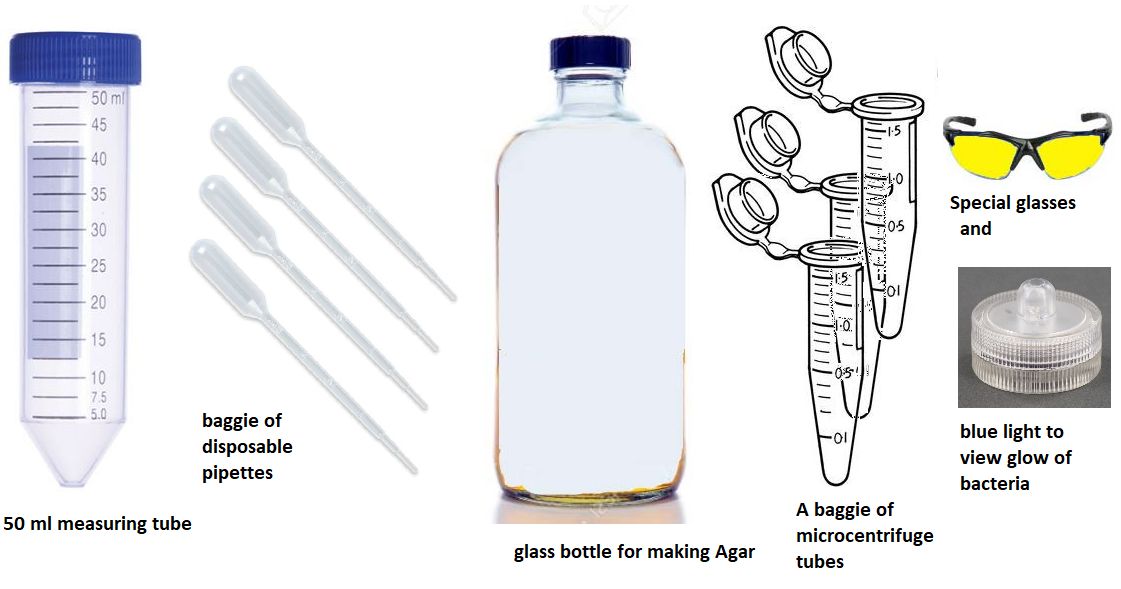
In the box you will also find plastic baggies that contain sundry tools you will need to do the experiment.

So here's what we are doing in a nutshell. In 2012, a scientist named Jennifer Doudna at Berkeley and her associates invented a tool that allows us for the first time in history to edit any DNA quickly, inexpensively and precisely. That tool is called crispr. The experiment we are doing here is a direct result of her/their invention.
We are going to edit the DNA of a bacteria whose name is e-coli by inserting a little piece of DNA from a jellyfish into the genes of that bacteria. The DNA we are inserting from that jellyfish is the gene that makes the jellyfish glow. So when the experiment is completed, the bacteria will glow.
Think of this experiment as following a recipe. I'll explain step by step what we have to do and why and also what happens at the end of each step. This means a few technical terms and some basic molecular biology, but it's really not more complicated than baking a cake.
The first step in the process is to make sure the 'work bench' and tools we'll be working with are clean... very clean... sterile clean.
I think we can assume that what is inside the plastic and glassware from the-odin is sufficiently sterile. So anything in those plastic baggies do not have to be sterilized. But the surface you are working on is a different matter.
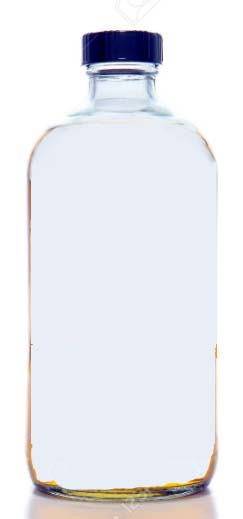
I use rubbing alcohol to clean the "bench" I work on. That's pretty standard. So I picked up a bottle of isopropyl alcohol and use that to wipe down the surface you will be working on.
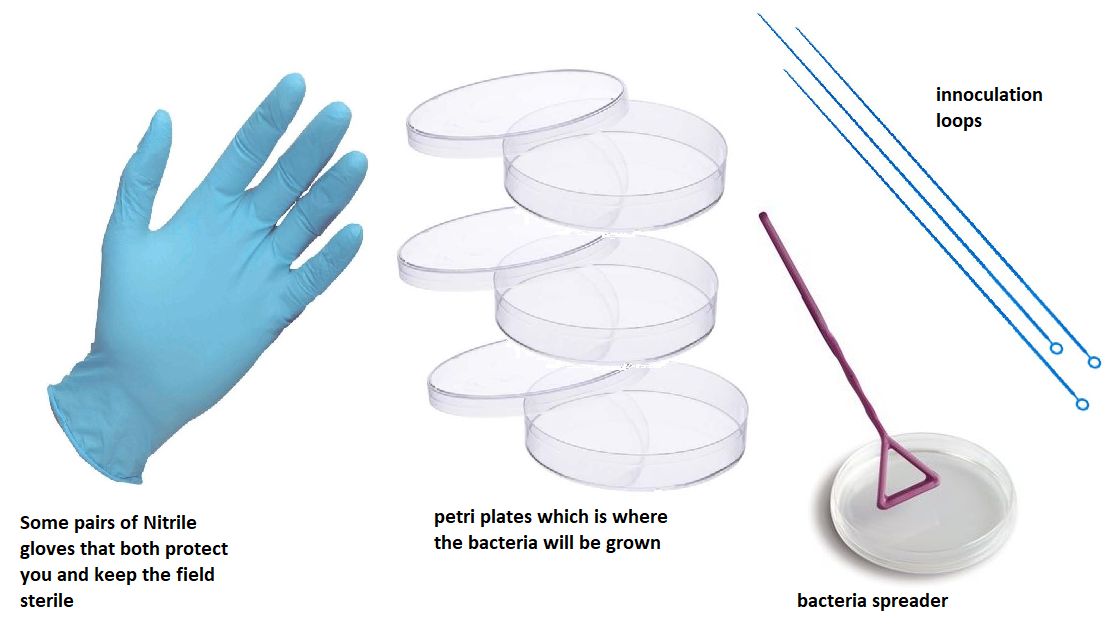
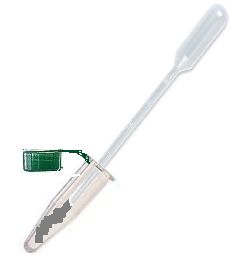
Also, included in the-odin package is a baggie of nitrile gloves. These are what you wear during the experiment. The gloves serve two purposes. They keep you from contacting any chemicals (protect your hands) and at the same time they prevent your hands from contaminating the experiment... after all, we too have DNA all over us... and bacteria too. So we need to wear these gloves during the experiment.
I suggest you read through all the instructions below before you start. That way you will get a more complete perspective of the experiment. The details are important.
You will be encountering units of measure that are unfamiliar. The sizes of the tubes etc are for our benefit... so we can manipulate them. The actual ingredients are at scales in the thousandths, millionths and even billionths of what is visible to us. Don't be intimidated by the small quantities. In this experiment the only quantity you have to actually measure is the water and that is in milliliter units... ie thousanths of a liter. Just use the provided measuring tube, which has scale marks for you to read.
Step 1
Now we need to make some LB Agar Media from the powder in the tube marked LB Agar. Be careful here NOT to use the tube marked LB Amp/PTG Agar Media.
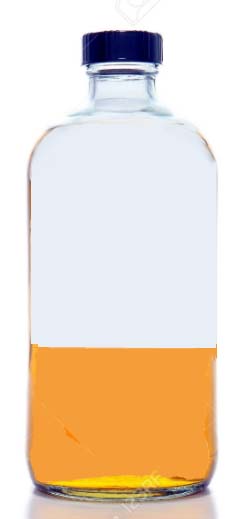
Pour the contents of the LB Agar Media tube into the glass bottle:

Then, using the 50 mL measuring tube,
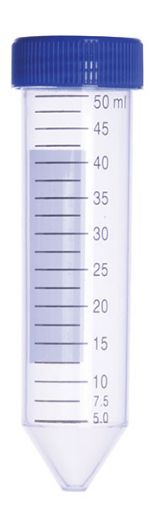
pour 150 ML of clean water into the bottle and slosh the bottle around to get the Agar to begin to dissolve.
Now we have to put the bottle into the microwave to make it completely dissolve. To do this, DO NOT put the bottle lid on tightly. Let it vent. Then, turn the microwave on for 10 seconds and then swirl it a little and then 10 seconds more.. repeat this until the liquid appears uniform. Don't let it boil over.
Step 2
Now let the bottle cool down until it is comfortable to touch. Do not wait too long as Agar is like jello and it will set up in the bottle.
Once it is cool enough to handle (still warm) pour the Agar into three of the petri plates. Just pour enough into each of the three plates to cover the bottoms of the plates.

Unless you have more plates than the seven I got in the box, you'll have to discard the rest of the Agar left in the bottle after you cover the bottom of three plates. We will need three more plates later, so don't pour the Agar in to the remaining four plates. Instead, empty the remamaining Agar into the trash as we will need to use the bottle again later and we don't want this extra agar to harden inside the bottle.
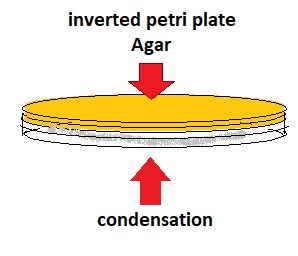
Now cover the plates with the tops and let the Agar cool for awhile and it will "set up" like jello. Moisture will form on the covers. Once the Agar has hardened a little, turn the petri plates upside down. This makes the condensation gather on the tops rather than in the Agar itself.
I let the plates cool to room temperature overnight.
step 3
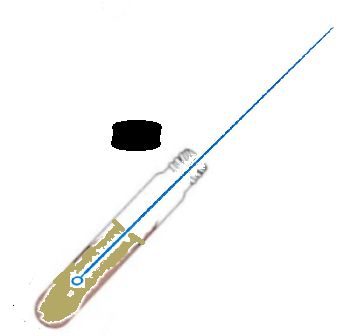
In the morning we are ready to grow our first batch of bacteria. Fetch the small tube we put into the refrigerator. It is the bacteria from the-odin that we are now going to grow on the Agar plates. It's called a 'stab' We want to take the small amount of bacteria in that stab and increase the colony by growing it on the Agar surface.
So the next procedure is to get the bacteria from the 'stab' and gently rub it onto the Agar surface to grow. To do this, we need an inoculation loop from the box.

Stick the inoculation loop into the gelatin following the same trail left by the stab. This will fill the loop with bacteria which can then be rubbed onto the Agar plates.
Agar is the food that bacteria eat. If we gently rub some bacteria on the surface of the Agar in those petri plates without breaking the surface, the bacteria will grow. This is how we increase the number of bacteria.

Re-cover the three petri plates and let them grow at room temperature overnight.
Step 4
Before we make any genetic changes, we need to make a new batch of Agar, only these new plates will be made from the second tube that contains LB Amp/PTG Agar Media.

Follow the same procedure we used when we created the original Agar plates. Step 1 and step 2 only this time use the LB Amp/PTG Agar Media.
Once these new petris are finished let them set all night at room temperature.
Step 5
Now that we have grown a lot more bacteria in the original Agar plates, it's time to begin the process of inserting the jellyfish DNA for glowing into the bacteria's genes.
Let's take a short detour here while I describe what will be happening next.
The-odin sent us what are called plasmids. That's a circular piece of DNA that contains 1. The crispr chemistry which finds the right spot in the bacterial genes to insert the jellyfish gene. 2. The jellyfish gene itself. 3. a piece of DNA that makes bacteria immune to the antibiotic Ampicillin.
When these plasmids get inside the bacterial cell, they make the proteins that make a cut in the bacteria's DNA, fills that cut gap with DNA from the jellyfish and also with the DNA that makes the bacteria immune to the antibiotic (which arrived in the plasmid too). When that is completed, the bacteria is now able to glow and also it is immune to the antibiotic ampicillin.
But one of our biggest problems comes before the plasmid even gets into the cell. Cells are not receptive to any old plasmid that comes along. Cell walls are very particular about what they let in. And since we are trying to get a lot of genetic material past the outer cell wall, it balks.
Fortunately cells can be 'shocked' chemically or by using extreme temperatures so that they are temporarily confused. In that confusion our plasmid gets inside undetected. Making the cells receptive to our plasmids is called making them "competent." In this experiment we are subjecting the cells to both chemical and temperature shock to make them competent.
Ok, now that we have taken the detour, let's get back to what we have to do to make this happen.
Step 6
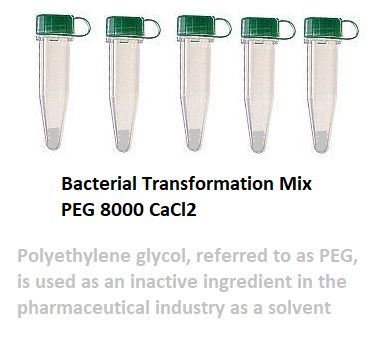
We want to mix the bacteria we've grown with the chemicals that will soften the cell walls amd carry in the DNA and crispr plasmids.
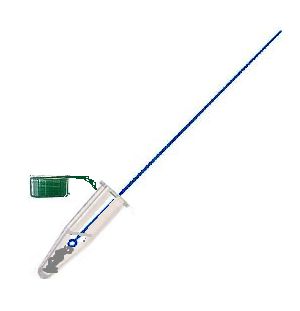
First we have to harvest some of the bacteria from the original plates because these are the bacteria we are going to transform. We do that by gently rubbing a fresh inoculation loop across the surface of the original Agar plates.
You should be able to see streaks of new bacterial growth where you originally rubbed the loop from the stab tube. When the loop is full of bacteria, stick it into one of the tubes called "bacterial transformation buffer" Mix until any clumps disappear. You can use a disposable pipette to gently suck and flush the mixture to mix it.
Now what we have is a mixture of e-coli bacteria and this buffer which contains Calcium Chloride. This salt is used because the cell wall is negatively charged and the plasmid we are about to add to the mix is also negatively charged. So the two negative surfaces would repel each other... which would make it impossible for the plasmid to get close to the cell wall. By adding the salt buffer with its positive charge, the surface of the cell and of the plasmid are neutralized and thus no longer repel each other.
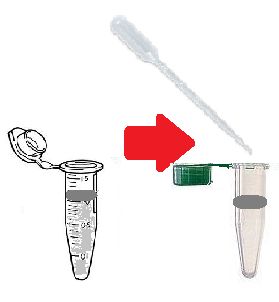
Now, using a pipette, add the contents of the tube called "plasmid" to the mixture.

Now we have the bacteria, the buffer and the plasmid all together and it is time to apply temperature "shock" to get the plasmids to enter the cell. This is done by:
a. incubating this tube in the fridge for 30 minutes.4 deg C
b. Follow that by incubating the tube for 30 seconds at 108 degrees Fahrenheit (42 deg C)
Step 7
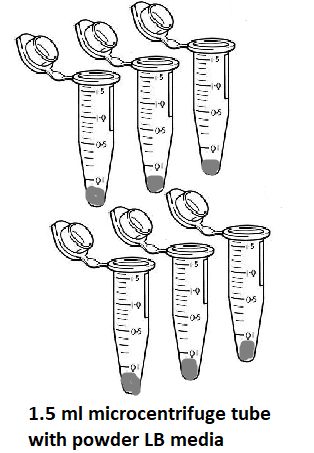
While this is going on, use a pipette to 3/4 fill one of the LB powder microcentrifuge tubes with room temperature water and shake the tube to mix the LB powder. What we are doing is creating food for the bacteria we are transforming.
After the 108 degree incubation in step b. above is complete, pipette about half of the LB mixture into the incubated tube that contains the bacteria, buffer and plasmids.
At this point the plasmids should have already entered the cells. (That's why we heat shocked them)
Close the tube's lid and gently flick the tube to mix it.
Now we want to incubate this tube at room temperature for about four to twelve hours. It takes a long time to get growth. During that time, the transformed bacteria will be nourished by the LB and start to reproduce.
Step 8
After that period, use a pipette to mix it and then pipette four or five drops of it onto one of the LB Amp/PTG Agar
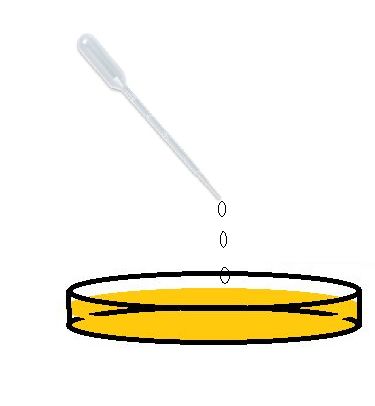
plates and use the bacteria spreader to spread it gently over the plate surface.

Step 9
Let this plate incubate for a couple of days and keep watching (using the special glasses and blue light) to see if glowing bacterial colonies start to grow.
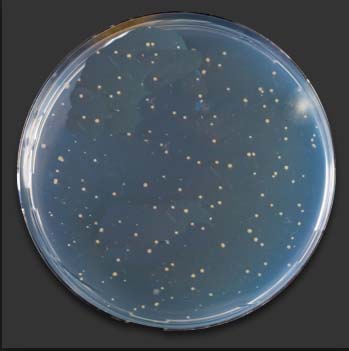
As the-odin says repeatedly, the experiment might not work for numerous reasons. Contamination, temperatures or even getting the steps out of order can spoil the result. If you don't get a growth of glowing e-coli at the end, I suggest you clean everything and give it another try.
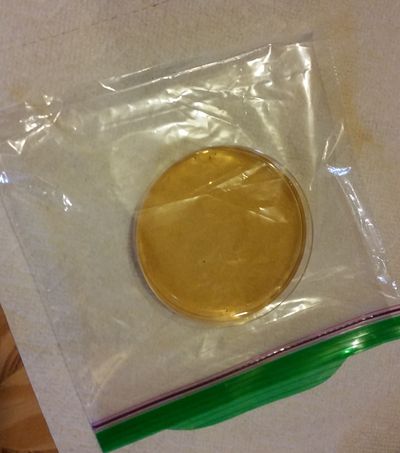
This kit contains enough material for five experiments. However, there are not enough petri plates to accommodate five experiments as each experiment requires two petri plates. (one for the Agar and one for the Agar with the Amp antibiotic) I imagine you could pull it off if you were to use the petri plates tops and bottoms for Agar and Agar/Amp. But then the Agar would be exposed to the air and possible (likely) contamination. Possibly covering the plates with clean covers would work. Here I simply slid the cover with Agar into a new plastic baggie. It works, but you have to be really careful not to spill it.
That would give you 14 total (ie 7 plates + 7 covers) and that would allow you to do all five experiments and you would not have to waste any of the Agar.
Finally. You may wonder what is the reason for the ampicillin? Why not just put the glowing jellyfish gene into the plasmid? Why put the Ampicillin immunity gene in there too?
The answer is this. Some of the bacteria in step b. were changed by the plasmids but others were not. It's a statistical thing. So at the end of step b. the tube holds two kinds of bacteria... the originals unchanged, and the transformed ones. Then when they are both dripped onto the plate to grow, they would compete with each other. In order to avoid the unchanged bacteria from competing with the changed bacteria, the ampicillin in the LB with Amp will kill the original bacteria but not the transformed bacteria because it has DNA that makes it immune to Ampicillin. Thus we get a stronger result.